Getting Started:
Create an Account:
After installation of the App user will have to create account. So following are the steps to be followed for create an account on Ustad online:
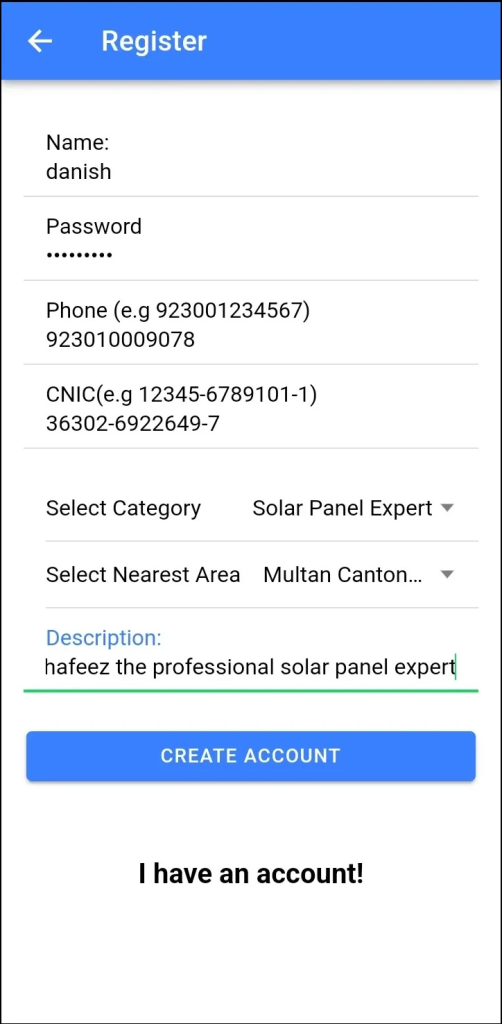
Register Now page: Click the “Register Now” button on the sign-in page to go to the sign-up page and create your account
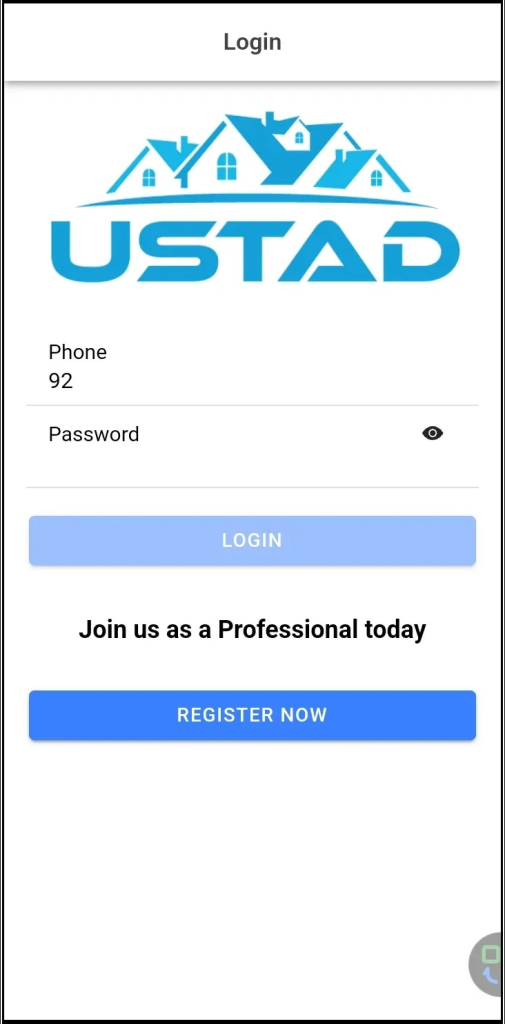
- Required Information: Enter the required information in field boxes.
- Name: Enter you full name in the Name field.
- Password: Enter the strong password as you required. (minimum password length is 8 )
- Phone number: Enter your phone number, it will be in format as 92308077668.
- CNIC: Enter your complete CNIC number (e.g 36302-12345783-0).
- Select Category: Select the job categories according to your skill/occupation.
- Select Nearest Area: Select the nearest location by click on drop down.
- Description: Enter the description about yourself.
- Create Account button: After entering required information click on create account button for complete registration.
- I have an account: if you already have an account click on this button, you will redirected to sign in page.
Login to Account:
After creating account you will have to login in to account, following are the steps for login to Ustad online account.
- After sign up you will redirected to sign in page.
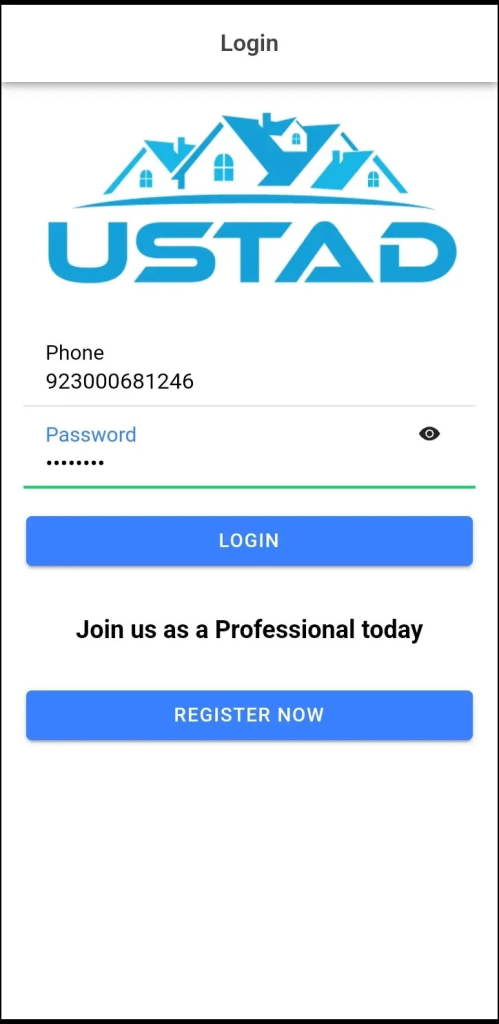
- Phone number and password: Enter your account phone number and password for login.
- Sign in button: after enter login information click on sign in button and you will be redirected to post job section/page.
User interface overview:
Description of components (menus):
In this section we will add the description about the menus of Ustad Online App. User will click on 3 lines from top left corner, navigation menus will open.

Home:
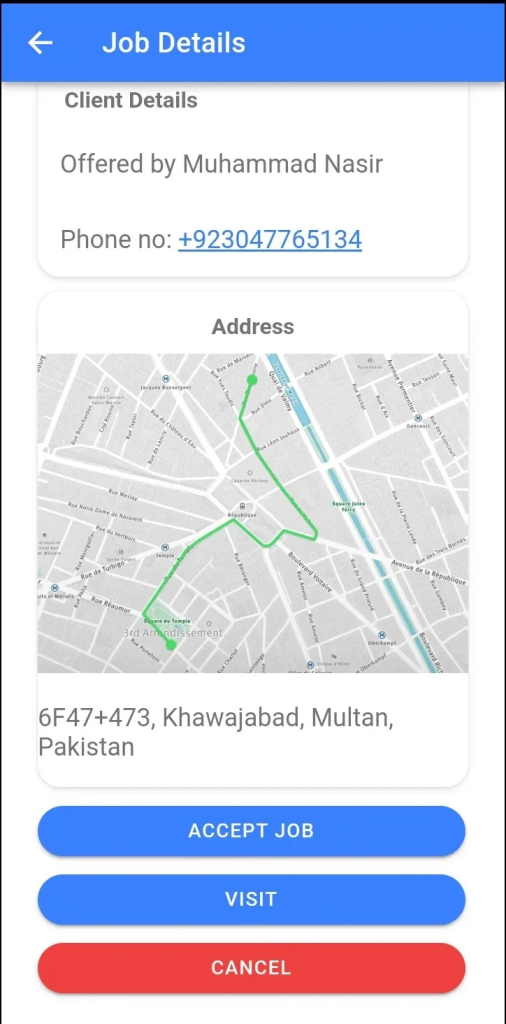
Click on the “Home” menu to go to the home page. professional can set your status to “Go Offline” or “Go Online” and see a list of jobs assigned to you.
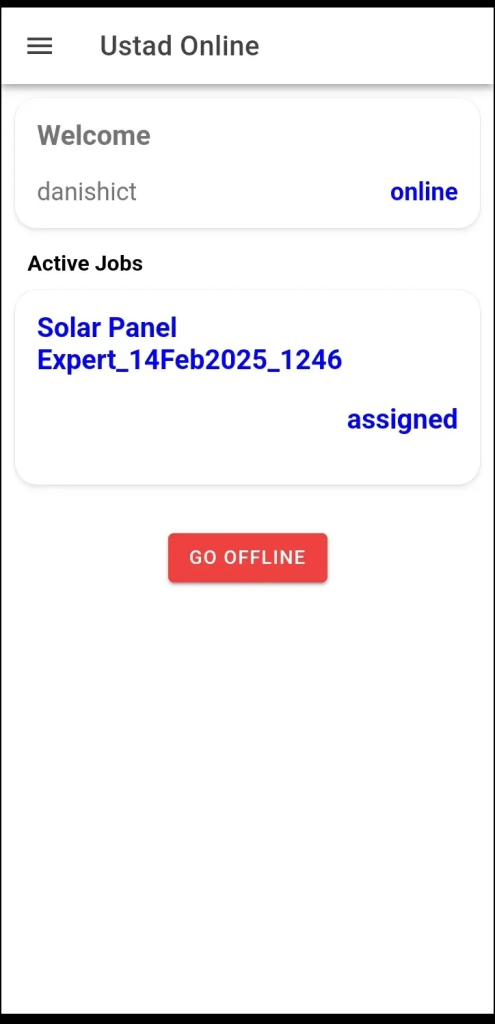
Click on an assigned job to go to the job page. From there, professional can accept the job, cancel it, or view the client’s location for a visit.
Job Dashboard:
Click on the job dashboard menu to go to the page where professional can view and monitor accepted or active jobs. Click the start button to begin your shift, track active shift time, and see the total time worked.
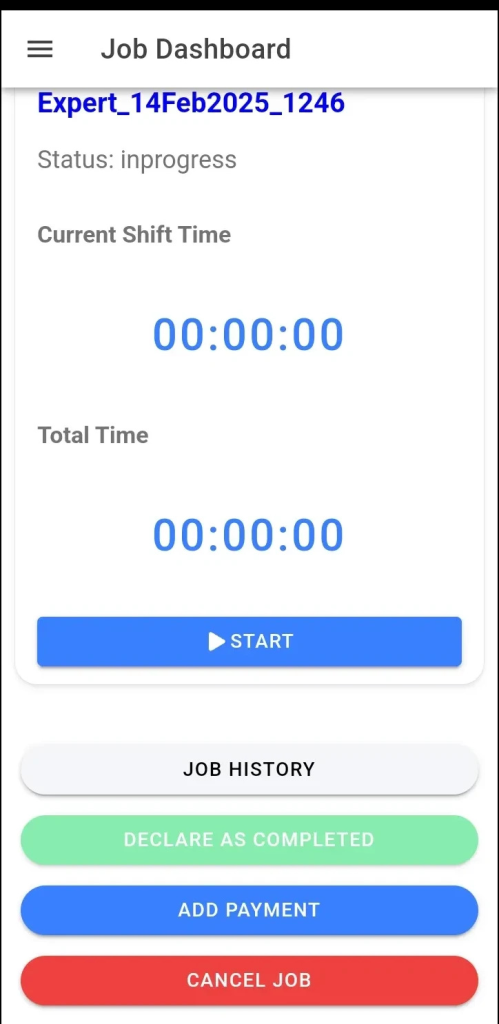
professional can do following operations in job dashboard page:
Job History: Click on the job history button to view your current job history, as shown in the image above.
Declare as Complete: When you click the completed button, the job will be marked as complete, and a notification will be sent to the client and admin. The client will then rate your service.
Add Payment: After completing the job, click the Add payment button, enter the amount, and then click Add.
Cancel Job: If you wish to cancel a job, click the cancel job button.
Payment Log:
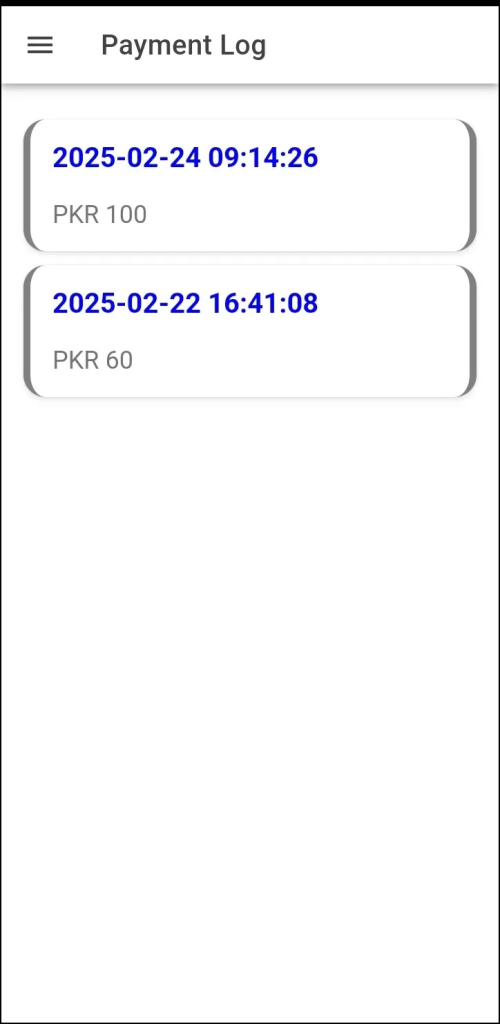
Click on the payments menu to go to the payment log page, where professional can view a list of payments made to you or charges for your work after completing a job.
Ratings:
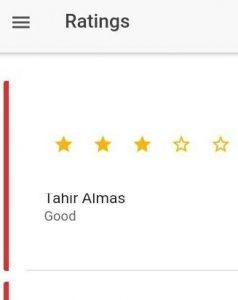
Click on the ratings menu to view the ratings given by clients after completing jobs. Clients can also provide feedback.
My Jobs:
Click on the My Jobs menu to view different job categories such as Assigned, Completed, Canceled, and Canceled by Client.
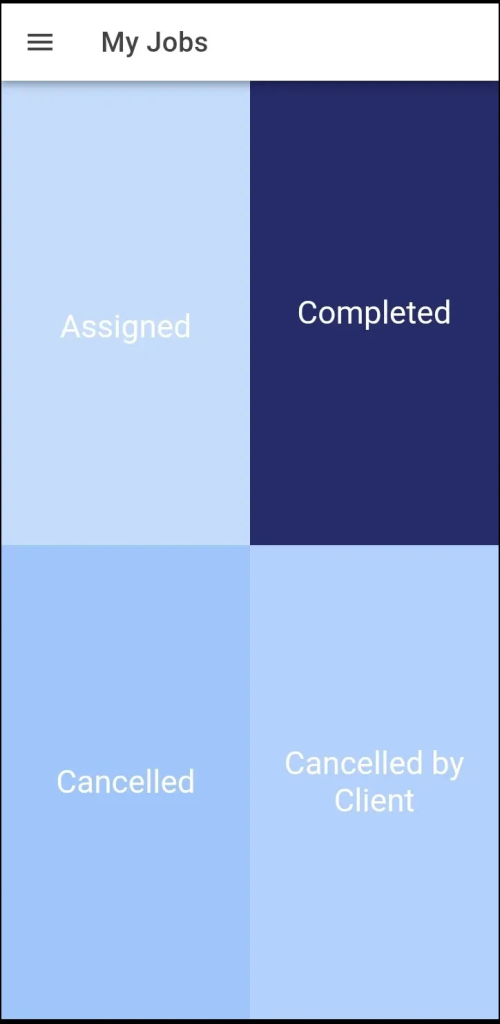
Assigned: Click on the Assigned box to view jobs that have been assigned to you by the admin or client.
Completed: Click on the Completed box to see jobs you have completed.
Canceled: Click on the Canceled box to view jobs you canceled.
Canceled by Client: Click on the Canceled by Client box to see jobs that were canceled by the client.
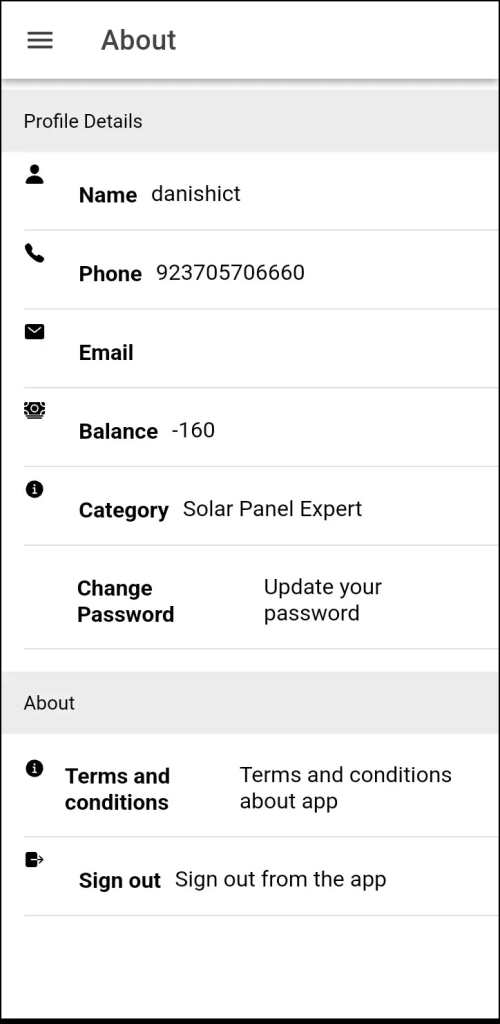
About:
Click on the “About” menu to go to the About panel. Here, professional will find two sections that provide details about Ustad Online
Profile Details: In this section, the professional can view personal information like Name, Phone Number, Email, and Account Balance. To update the password, click on “Change Password.”
In the About section, the professional can read the Terms and Conditions by clicking on the “Terms and Conditions” text.
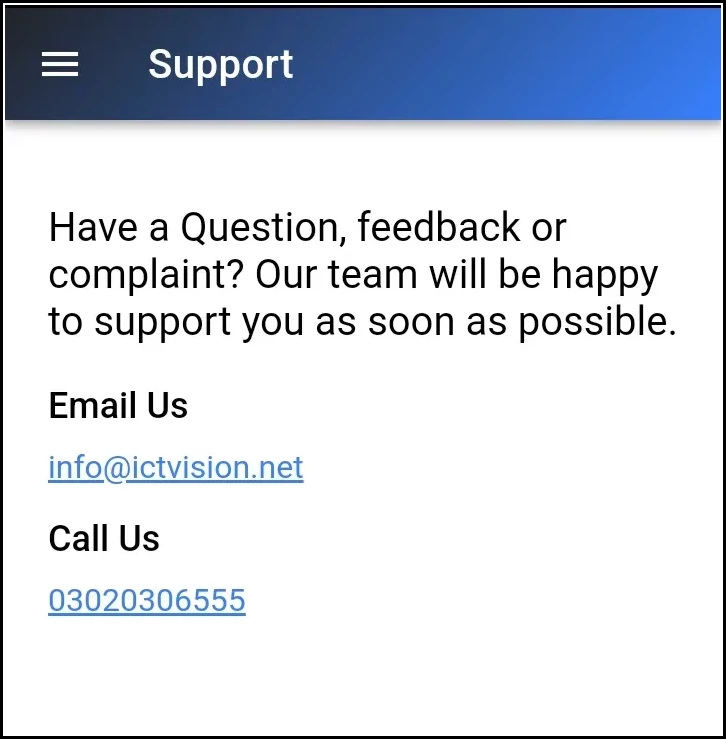
Call or Support:
Opens the support panel, where professional can contact the Ustad online team via the provided email or phone for questions, feedback, or complaints.
Log out:
Click on logout for logout from Application.